Friday, 3 July 2020

Dead alkaline batteries


What is this? A small collection of dead alkaline batteries.

Collection of dead alkaline batteries

Although presented to me as dead they weren't all in that state, as their measured outputs ranged from 0.05 to 1.55 V (after I looked at them again I noticed that one was a rechargeable, doh!).

Measuring voltage of unloaded batteries

The C and AAAA cells can be put back to general use as OK(ish). The rest would usually be put out for recycling but I got to thinking… is there another use for them?

So, what is an alkaline battery made from?

Diagram of the internal parts of an alkaline battery

A variety of things it appears. The chemicals inside are Zn/ZnO and Mn(III) and Mn(IV) species plus some KOH wrapped up in a stainless steel can with a brass current collector. Nothing I really need to play around with at the moment, and it's not like dead batteries are hard to come by. So that's a pass on the raw materials.

When I measured the voltage of the remaining 3 AA cells they were 0.05, 0.55 and 1.12 V, indicating that they are all pretty dead, ie there was not even any juice to be recovered by using them in a less demanding item. It is possible to charge alkaline cells another couple of times with a special charger (such as this one), but generally they are pricey for what they are and are not recommended. Making one would be a nice scratch build, but that is a project for another day.

Chart to assess the remaining charge of an alkaline battery

So the answer to the question of 'is there anything else I can do with them?' is, not really. Off to the recycling bin it is then.

JOB DONE

Time taken: 5 mins
Cost: £0.00

Tuesday, 30 June 2020

Dr Martens Boots Shoes


Unearthed from under the bed, one pair of Dr Martens shoes.

1461 Dr Martens shoes

They appear to be a pair of 1461 Oxford style DMs; made in the original factory in Wollaston, England, before the corporate suits at Permira closed it in 2003 and shifted production to Thailand.

Originally made from German fighter planes, the brand didn't really take off until the '60s when the design was licensed and improved by R Griggs Ltd. in the UK. Initially sold as cheap and practical workwear they became counter-culture fashion items in the days of punk and ska, but are now sold mostly as a general fashion brand.

Bob Martens on the street

I don't know if these count as vintage but they are not new. They are in OK nick but I can't wear them anymore, so it's time to move them on to someone else. On inspection the only thing that needs to be done to them before sale is to clean the shoe polish off the signature yellow sole stitching around the welt.

Discoloured sole stitching due to polish

A bit of on-line research threw up a range of different methods for cleaning up the stitches, mostly revolving around the use of solvents; isopropanol, acetone and lighter fluid were all mentioned. Basically anything that will solvate the wax in the polish should work and to this end a review of Wikipedia indicates that shoe polish is a mix of wax and dyes in 70% solvent (Stoddard solvent - a form of white spirit or naphtha).

Let's compare and contrast. I applied each solvent to a single stitch with a cotton wool bud and then cleaned off the polish with another dry cotton wool bud.

SolventBeforeAfter
Acetone
Isopropanol
White spirit

Overall the performance of each solvent was much the same as the others. Perhaps acetone was marginally worse at removing the polish than the other two and seemed to attack the rubber of the welt slightly, but if it is what you have to hand it will still do the job. For me white spirit is probably the first choice for this task and in total I used about 5 mL of solvent to clean the pair.

Before (L) and after (R) cleaning with white spirit

JOB DONE

Time taken: 20 minutes.
Cost: pennies for white spirit, liberated cotton buds for free.

PS The title reference is to Mr Balowski's nephew.

Sunday, 24 May 2020

Freezer Gloves


Tired of almost getting frostbite while digging through the chest freezer for that bag of sausages that you know is in there… somewhere…?

I am.

I noticed that the freezer guys at Tesco were wearing something more insulating than disposable gloves but not as bulky as freezer gauntlets (yes they are £160/pair, but to be fair you can work down to -190oC in them).

Off to eBay, which brought forth the snappily titled Thermal Insulated Winter Work Gloves Latex Coated Cold Safety Freezer Strong at £2.69 a pair including p&p.


At that price, even if they are no good at all, what can go wrong?

So I duly ordered some and they look just as naff as the ones in the picture; but they do the job. Result!

Freezer Gloves Strong

All that was needed was to sew on a couple of loops so that they could be hung up in the kitchen. I found some similar material and badgered one of the tykes to do that.

Freezer gloves hunged up

JOB DONE

Time taken: none for me, 45mins for tyke
Cost : £2.69

Monday, 4 May 2020

'Fridge Crisper Drawer repair


Somehow one of the feet of the crisper drawer has become detached.

Offending parts

It's a clean break, in a slightly awkward place, but probably not too much of a challenge. The drawer is moulded from the same styrene-acrylonitrile resin that the cup I partially repaired was made from.

OK, repair strategies? From best to worst those that I came up with were,

  • Solvent weld the parts back together
  • Use a contact adhesive
  • Use a two part epoxy to fill whole socket and stick the foot into well
  • Fit a screw (would have to be stainless steel)
  • Buy a whole new crisper drawer

Why is solvent welding best? As with ordinary metal welding it physical melts and reforms the structure of the plastic.

Although it didn't work brilliantly in the repair of the plastic cup I brought out the acetone again. After brushing on the solvent and replacing the part I left it overnight to harden. The next day an exploratory wiggle to see if the bond could withstand the lateral forces created by dragging the drawer across a surface resulted in it parting again, confirming my suspicions that acetone is a bit pants for gluing SAN.

The next step was to try a MEK/DCM mix; I had seen Tensol 12 used for ABS so that seemed a good place to start. A web search threw up a few similar glues, SciGrip 16, Ventex Channel Bond and Evo-Stik ExtruFix (I would provide links for Tensol and Extru-Fix but they are made by a French company that doesn't understand the internet). All seem to have dichloromethane (DCM) as a base with 3/4 containing methyl ethyl ketone (MEK) along with a smattering of other components, probably for the purposes of wetting and/or prevention of crazing. None of them were really that cheap (£8 for 60 mL of Tensol 12 was the best price I could find) and I couldn't find anything to say that they would definitely work with SAN. After a bit of swithering (look it up) I decided to buy a litre each of the main constituents and mix my own. If it didn't work then at least I would have the solvents to hand, so not a complete waste of money.

After deciding to buy the components I tracked down a reference to solvent welding SAN in the Handbook of Plastics Joining (p.442), which suggests that MEK is the required active component and that DCM can be used if a fast drying solvent is required. All good then.

But what proportions to mix the DCM and MEK to? A rummage about in the material safety data sheets of the ABS glues gave me a place to start In the end I plumped for a 3:1 (v/v) mix, but weighed out the solvents rather than measuring the volumes as I was dealing with small amounts as a trial.

Solvent mixing

The result was positive.

Reformed part

Given the lack of effect of acetone I did splash the DCM/MEK mix about a bit and have obviously overcooked it, there is quite a bit of crazing in the foot well. But the part is certainly joined, if a tad melted. Next time I will be a bit more cautious and only brush on the required amounts. I just popped the foot back on and slid it back into the 'fridge.

JOB DONE

Time: 30 mins (with overnight setting time)
Cost: £19.44

Saturday, 28 March 2020

Shower swamp - Return of the Creature from the Back Lagoon

Or no good act goes unpunished.

The shower drain is up to its old tricks again. This time instead of plungering the drain I decided to take the U-bend off to see if there was an ongoing blockage in it. Not sure why I chose this course of action but in retrospect bringing out the plunger first might have been a better idea.

The U-bend is easily accessible, as it is located in the unboarded roof of the cupboard that the fridge sits in. The drainward joint unscrewed no problem but the upstream one felt like it was attached with a liberal coating of treacle. When it came off it appeared that it had been slathered in silicone sealant.

Bodged connection to shower tray

The U-bend was pretty clean, no doubt an effect of the energetic plunger action I had applied previously, so no problem there. The receiving pipe, however, had a 'dead mouse' of matted long hair wrapped round the 90o bend that lies after the trap (I'll spare you the pictures). I extracted this and refitted the U-bend.

On reassembly the reason for the silicone sealant became obvious. The top joint of the U-bend had been damaged at some point so it was not forming any sort of a seal and the silicone had been put into to bodge the joint. Without the silicone the range of the shower extended from the bathroom into the fridge cupboard.

Damaged seal on bath trap

Time for a new part (40mm bath trap) from our very local plumbing supplies company. Reinstallation was easier as the silicone had been removed but the joint was still weeping a bit, probably because of a slight mismatch between the thread sizes of the PVC pipe and the metal shower outlet. A bit of PTFE tape solved this problem.

Repaired bath trap

JOB DONE.

Time taken : 45 mins hands on
Cost : £5.48 for replacement bath trap

Friday, 20 March 2020

Cup issues


One of the tykes has been too rough with a plastic cup and, while it isn't dead, it is not very happy.

Cup with an internal leak

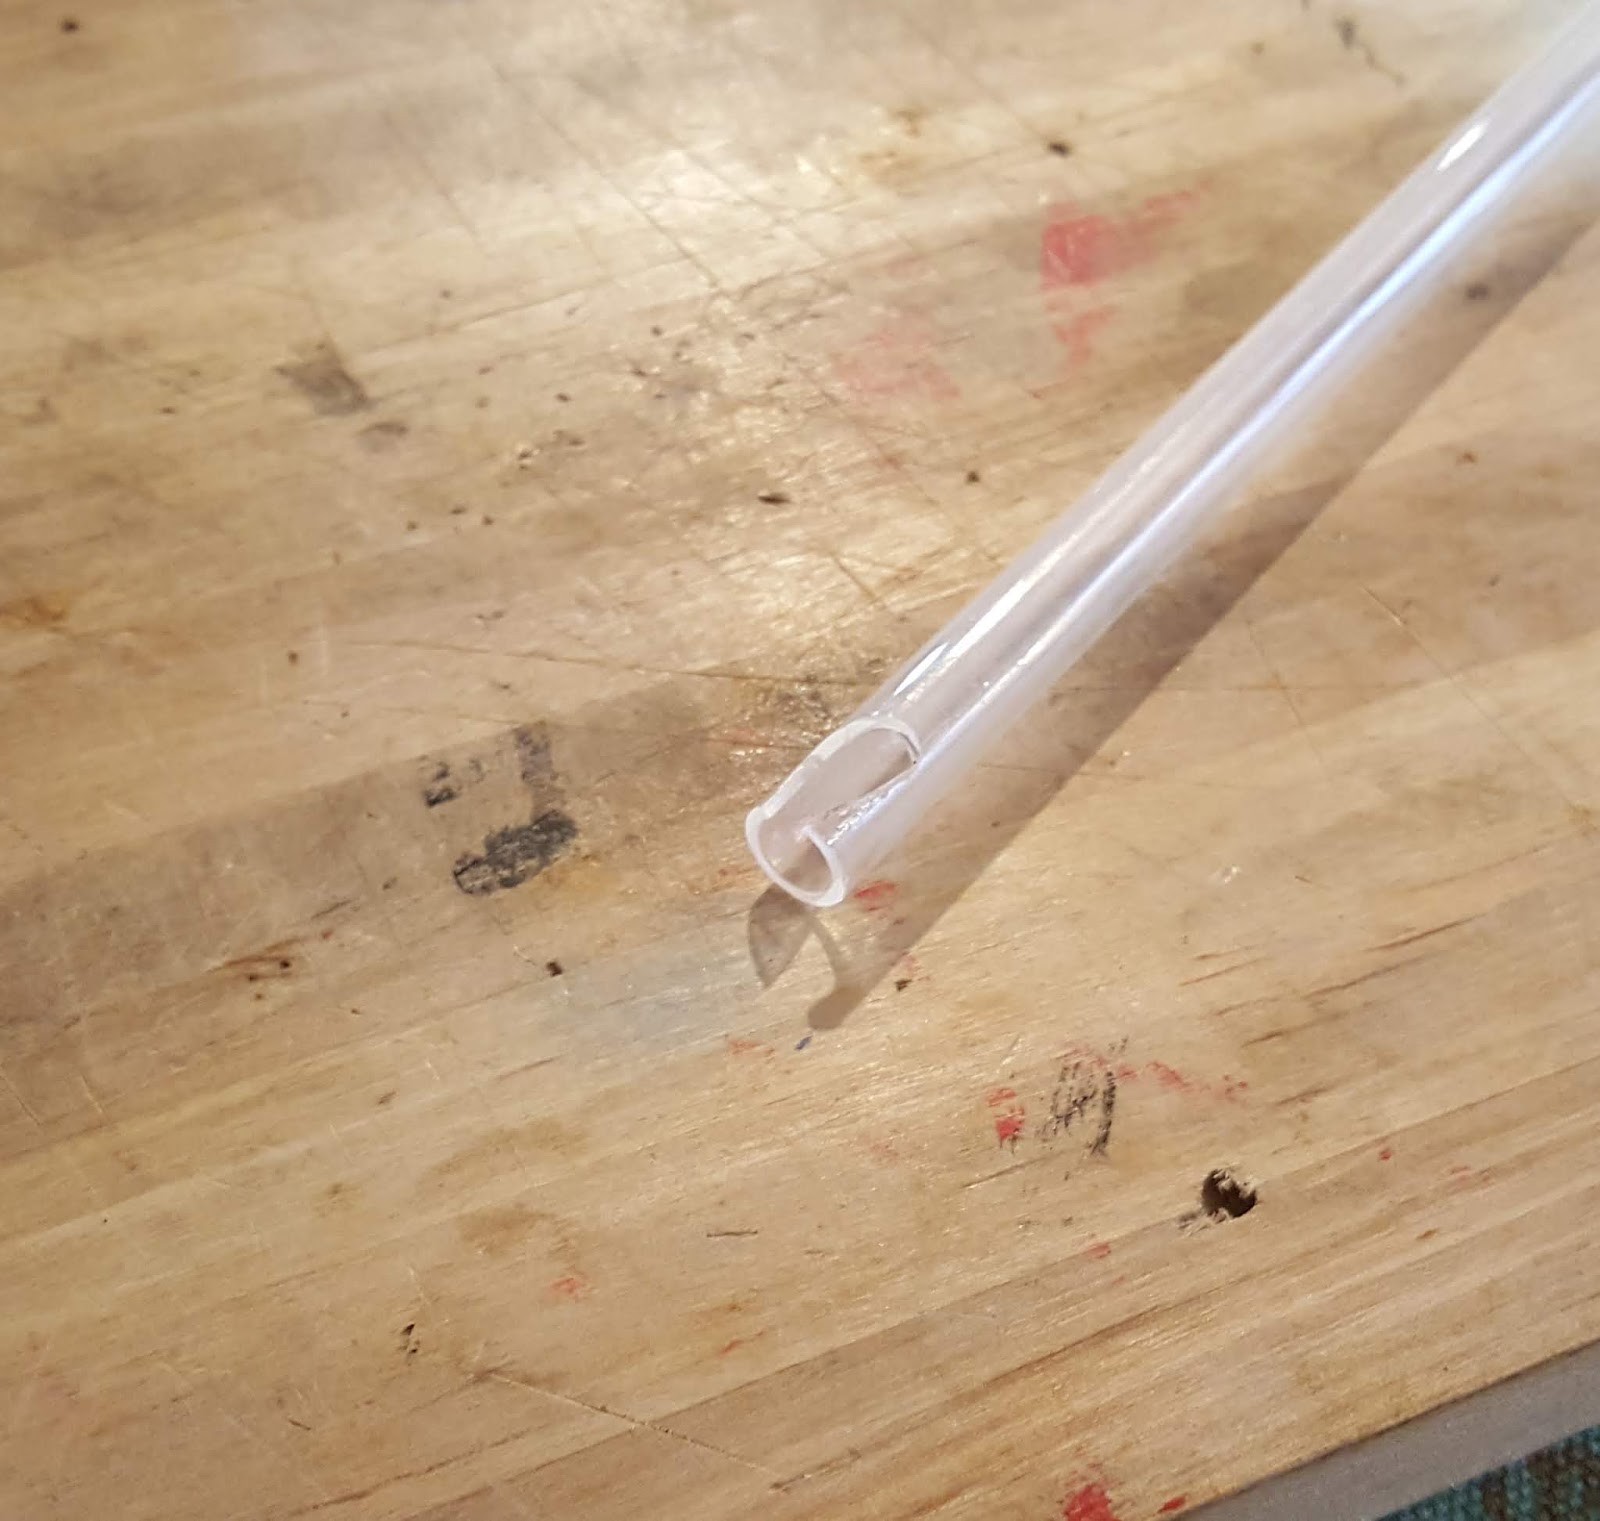
Broken drinking straw

As the first of the 3 Rs is to reduce I wanted to try and prevent another plastic cup being bought.

The first job was the straw which was missing a bit, but not too much. A quick hacksaw and then I filed it flat and removed the burrs with a round file and that sorted that.

Repaired drinking straw

The next task was to deal with the cup. How to get the water out and how had it got in?

Getting it out meant giving it the opportunity to escape the air gap that gives the cup its' insulating properties.

Non-obvious holes
Drilled 1.5mm holes at 4 and 10 o'clock

Two small holes should give the water the ability to evaporate without compromising the insulating properties of the cup too much. Then it was just leaving it for long enough to do just that.

So it sat next to the central heating boiler for a month.

OK, so how is the water getting in?

Repaired cup

It seems to have developed a crack at some point (after being dropped perhaps?). Solvent welding using capillary action to wick the solvent into the area that needs to be bonded would probably be the best option. But what solvent to use?

The first thing is to identify the plastic that the cup is made out of. In this case the retailer's website wasn't helpful but as they only rebrand stuff (and slap on a healthy margin for the service) you can find similar items out there. Alibaba is a great resource for more detailed product information as you can get direct to the manufacturer. In this case a search for 'tumbler with straw' quickly yielded a couple of identical items (bar the printing/branding) [cut down links to ali items].

In this case it appears that the plastic is SAN, which is commonly used for food-ware and is a relative of ABS. A search for suitable solvents yielded


Courtesy of the AdhesiveTechnology Handbook [p.222].

I have the first three to hand, but acetone is the more pleasant to work with, so I brushed on enough to saturate the fractured area to see if that could seal up the break.

The fracture wicked up the solvent OK and it has had an effect but not a complete one. I have another fix that will use a dichloromethane/MEK mix so I will return the cup to use and try again when I tackle that fix.

JOB (sort of) DONE

Time taken : 30 mins
Cost: Pretty much nil

Thursday, 21 March 2019

Buying loppers


The ivy on the shed has got beyond a joke, to the point where it is almost structural now. Time to get cracking, err hacking.

Spot the shed!
No better on the other side!

And so we did, I roped in the tykes as lump labour. But secateurs can only get you so far and sawing back the ivy branches was a major pain in the posterior. Time to up the duty level and get something with more grunt, ie bigger secateurs, aka loppers.

Generic loppers

Apparently there are two sorts, anvil and bypass. The latter is for gentler, precision pruning of things you want to keep, ie not the ivy. The former has more grunt but leaves a messier edge and can cause more damage to the green thing you are applying it to, which sounds like just the job.

So time for a bit of tool shopping, what a drag….

There is a wide choice of types of mechanism on the market with a range of prices from dirt-cheap Chinese brands to stupidly expensive (and I assume sharp) Japanese ones. Too much choice really for a novice like me. The first decision to be made is whether to buy cheap or get something that will see out a few seasons.

A pair of cheap Chinese loppers can be had for £12-15 from eBay, and if I thought that clearing the ivy would be a one off job then they would do. However as the ivy is likely to fight back and there are also other woody plants in the garden that will need attention over time, I will make a branded name purchase.

As I am not going to fork out for multiple pairs of loppers I want the pair I do buy to be able to handle as broad a range of tasks as possible. That will mean the capability to handle thick branches and telescopic handles to increase the range of situations that they can be used in. There's no need for them to be lightweight as A) I won't be using them all day and B) I should be able to handle the weight. Finally, I am agnostic on the cutting mechanism apart from the fact that simpler is better (less likely to break).

Getting hold of a decent review proved more of a challenge than I thought it would be. There were a lot of the 'top 5' type, with monetised links off to Amazon and lots of pictures of factory fresh tools that had never been used in anger. The most useful I found were from Gardening Products Review and Fred-in-the-shed. Fred basically sold me on the Wolf-Garten loppers, if they can last 10 years use and still get a recommendation then they will be OK for me.

Wolf-Garten sell 3 different models of anvil loppers. The pair with largest cutting range and telescopic handles looked like the ones for me (model RS900T). They are pricey at £90, but Mr. Amazon will give you them for £50. Decision made.

Wolf-GARTEB RS900T Telescopic Anvil Loppers

Attack!

Post-cutting
Nice sharp, fresh cuts

Have used them for a few sorties on the ivy so far and they have worked no bother, smooth cutting action and, as ivy is not very dense at all, capable of cutting anything that I can get the jaws around. Process is now to fill up the green waste bin with ivy cuttings every two weeks, we are 12 weeks in and not much of a dent made.

Time taken: About half a day to do the research and spec the loppers
Cost: £49.99 (inc p&p)