Wednesday 19 October 2016

Putting it back together


With all the requisites for brazing to hand I thought that I had better make a trial attempt before having a go at the real thing, so I cleaned up a pair of nails that I found rolling around the shed.

The first attempt was a complete failure. I hadn't secured the two nails in place and, being round, every time I brought the brazing rod in they rolled apart, doh! On the second attempt, after wiring them together, I got a bond. But the distribution of the braze was not even across the two nails (the smaller had more) indicating that I hadn't got them both to the right temperature. This was confirmed when I took them to A More Experienced Man who promptly twisted them apart and said "that hasn't worked." However I thought I had got the hang of it, mostly.

The brazing process for the fireguard took another 3 sessions, each faster than the last. I learnt a few things on the way; that the workpiece had to be red hot; that if the flame was showing green tinges I had the brazing rod too close to the flame; that lots of flux was a good thing; and that it was best to heat along the thick rod and move the brazing rod in behind the torch flame. In then end I got the thing together even though some of the mesh wires got a bit distorted and some of the joints were, from my reading, far too far apart. Fortunately the fireguard isn't structural so my crappy joints won't be overtaxed and overall it doesn't look too bad.

Brazed and unbrazed workpieces

Immediately after brazing I doused the hot workpiece under the hose and removed as much of the scale (ie flux) as possible with a wire scratch brush and a pair of pliers. I followed that up by grinding back any excess braze with a Dremel grinding stone and more brushing with a steel wire attachment on the Dremel to remove the last of the scale. Finally I used& emery cloth and wet & dry paper until I had everything smoothed out and any burnt paint sanded back. I gave the whole thing a white spirit wash and it was ready for painting.

I hummed and harred about which paint to use but in the end I settled for engine enamel because it has a gloss finish and the fireguard isn't likely to get massively hot (the enamel is OK up to 150oC). Two coats of that and job done.

Painted re-worked fireguard

Refitting the brazed panels was straightforward and everything came together as planned. The overall cost was quite high, but 60% was for tools and of the remainder probably only £10-15 of consumables were actually used. Not too bad for a custom fit piece.

Re-assembled fireguard

JOB DONE.

Time taken : A week (excluding delivery time)
Cost : £102.98 (including £59.62 for tools)

Tuesday 18 October 2016

How to braze


As usual when researching a new topic, the first port of call was Wikipedia. Thirty minutes of reading later, crimey! Talk about complicated.

After a strong cup of tea and some cogitation it seemed that the easiest route would be to torch braze with either a silver or brass alloy. However I was going to have to do a lot more reading before I could make any progress. The web was, as usual for practical technical subjects, a bit patchy. But a YouTube search did at least give me some examples of what the process looked like. Unfortunately I couldn't find enough of the right sort of information to make decisions about which brazing system to use and what I would need to get hold of to carry it out.

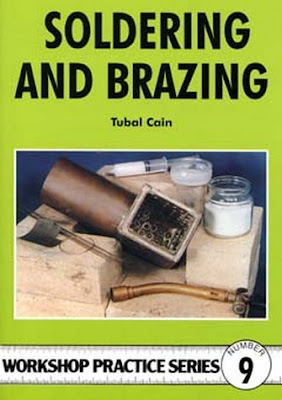
In this situation wise words are "if you want to save a week in the shed, spend a day in the library" and I came up with two books on the subject, Soldering and Brazing by Tubal Cain (Workshop Practice Series #9) and Brazing and Soldering by Richard Lofting (Crowood Metalworking Guides).

Brazing and Soldering by R Lofting

Soldering and Brazing by T Cain

They were both useful, covering the subject from slightly different angles but broadly were aimed at the practical aspects of the process. Once read they allowed me to work out that I could use bronze brazing and a propane torch to get the job done. Thus avoiding the expense of silver-based alloys and kitting out with multiple gas cylinders for a process that I might not need again.

The shopping list for the job involved
  • PPE (safety specs - already had, a pair of welding guantlets, and a fire extinguisher - hose pipe)
  • Consumables to prep the workpiece (Dremel flap sanders and some soft iron wire to secure everything in place)
  • A brazing hearth (a donated trolley and some old fire cement as firebricks)
  • Requisites for the brazing (a blow torch and some propane gas)
  • Brazing consumables (bronze brazing rods and sifbronze flux - obtained a small quantity together on eBay)
  • Something to process the workpiece afterwards (quenching trough - hosepipe again, wire brush - already had, Dremel to grind back any excess braze, and wet & dry to clean up the workpiece).

So while the orders arrived I cleaned up the surfaces to be brazed, removing any paint and taking the metal back to bright steel, in preparation for putting the pieces back together.

Wednesday 5 October 2016

Pot stove guard


When we moved into the house the kitchen had a pot stove in the fireplace where there had probably been a small cooking range. It's nice enough decoratively but as the chimney is functional I spent some time sorting out the register plate in the fireplace and getting our local sweep to come in and clean out the chimney. He told us that the lining of the chimney had decayed and that we should have it replaced or a stainless steel liner fitted.

As the roof on this part of the house required replacement we had the roofer drop a liner down the chimney at the same time as it was being re-roofed. A bit more time was spent converting the register plate into a closure plate. Basically this meant fitting a hit-and-miss vent to stop any moisture building up in the now enclosed space between the liner and the chimney walls.

Now the thing was ready to fire again, and was a few times, but I just couldn't rely on one of the Tykes not running into it while it was hot (and still can't even as they approach teenage years). The solution was to take the wire cage fireguard from the living room which had outlived its usefulness (as the Tykes are now old enough to know not to mess with that fire) and move it into the kitchen.

The guard had been made in two halves and is about five foot wide and a foot deep, with the centre rising in an arch, The rearrangement was obvious, simply swing the two ends together forming a cage that was longer than it was wide with the open end and the tops of the arched segments at the rear. Then push the reformed cage into the alcove round the stove.

And it even worked; sort of. Unfortunately the stove pipe stopped the two halves of the fireguard from lying next to each other. Meaning that the whole thing was sort of scissored round the stove and pipe, the clips that were supposed to join it together couldn't be used and the whole thing couldn't be fixed in place. Generally a less than satisfactory situation.

After using it like this for a while (read a year or so) I decided that as part of the kitchen MRO process I was going to sort it out. A bit of metalwork was going to be needed, my skills in which haven't advanced since the second year of comprehensive (ie they are still nil).

I decided that I could cut out the corners and flip them over to create the required rebate for the stove pipe. As my spatial reasoning is appalling, out came drinking straws and scissors so I could confirm that if I made the cuts the ends would come back flush to each other. Then it was just a matter of making the measurements for the rebate size needed to fit the guard round the stovepipe and out with the Dremel (with a slight side-step to buy a new tool, a set of cheapo measuring calipers to get an accurate diameter on the stovepipe - these were OK after I had ground the ends square). I used a protractor to mark out the cuts as near as possible to 45o and made the cuts on the frame wire first to minimise any movement during the cutting process; followed by detaching all of the mesh wires close to their attachment point on the frame wire. After this I ground back the remnant stubs of the mesh wires from the detached frame wire piece and voila! It was able to flip over as required and formed the correct size rebate.

One section of cut fireguard

Only the small matter of how to rejoin the pieces remained. I could glue it but I was pretty sure that a) it wouldn't last and b) the heat from the stove pipe might melt it out the first time the stove was lit.

So a metal joint was probably a better bet. Welding then? A bit of reading lead me to the conclusion that I was going to have to buy a lot of kit and that I had cut the guards the wrong way (the welding process prefers a butt joint to a chamfered one).

The next option was soldering/brazing. I was still going to have to buy some kit, but the joint was cut correctly for these processes at least. For this application there wasn't much to choose between them. The stovepipe gets too hot to touch but is not likely to get hot enough to melt a solder joint. Brazing is stronger but a bit more tricky to get to work. However as I haven't done any brazing before this is what I went with.

Monday 3 October 2016

Clothes airer repair


Moving along from the oven the next piece of kitchen equipment in distress was a clothes airer; a pulley type that hangs from the ceiling. The issue here was that the cleat that the rope was fastened to in order to keep the airer at ceiling height had come away from the wall.

Bodged plasterboard wall cleat Broken pulley airer

As you can see I had just bunged in a couple of Rawlplugs to see if it would work - it didn't. OK so now I have to replace the fittings. There are a few options for fixing into plasterboard,

Spring toggle, hollow wall anchor, self-drive and nylon toggle plasterboard fixings

Given that the cleat is going to be experiencing quite a bit of lateral force and that the load is not static (as the fitting will flex when the airer cords are applied and released) a fixing that is able to spread the load over a wide area rather than just on the edges of the fixing hole would seem to be preferable.

This narrows the field to spring toggles, GripIts or metal cavity (or hollow wall or interset) fixings. Relative data on the load carrying capacity of each was difficult to find but the metal cavity fixings looked like they were the strongest (9-18kN load depending on plasterboard and fitting size; p.81 Rawlplug Lightweight Fittings Guide). The toggle fixings were going to need a large hole cut to get them in, one that the base of the cleat was not going to cover. The GripIt fixings also needed a large hole cut and it was going to be difficult/impossible to get two in close proximity. For that reason I decided to use intersets.

The first issue to solve was that the countersunk holes in the cleat were too small to take the M6x60mm fittings. Out came the drill press and the holes were enlarged slightly to accommodate the M6 bolts.


Countersunk holes in cleat drill out to 6mm

The next issue was that, because of the close proximity of the two holes in the cleat, as the interests were tightened the closest legs would interfere with each other. Removing a leg from each of the interests with a Dremel cutting disc remedied this problem.


Cleat with pair of fettled intersets

The holes in the wall that had the Rawlplugs torn out of them were large enough so that the cleat assembly could be tapped straight into place and the interests tightened


Repaired wall cleat Operational pulley airer

JOB DONE.

Time taken : 2hr
Cost : £0.92 for intersets