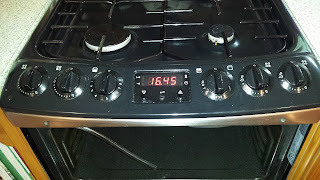
OK, so the top oven gasket has been fixed (twice), next job was to repair/replace the button that had broken off the control panel on our Zanussi ZCG551GXC cooker.
 |
| Broken middle button on control panel |
This meant getting under the hood, so to speak. For repairs to anything this is not always a straightforward process as you need to find and remove all the connectors holding the item together and often it takes a specific twist or order of disassembly to successfully to separate the pieces without damaging anything.
For white goods there are a few places to ask for help that often turn up trumps. Whenever I get stuck the ukwhitegoods forums are often helpful, but not in this case unfortunately. Other places to try are DIYnot or the Screwfix forums, but being more general they are often less helpful for this type of question. So it seemed that I was basically on my own with this one.
First task was to pull the oven out from its alcove, dislodging one of the feet in the process (this would have been part III if it hadn't just screwed back into place). Then another bucket of soapy water was made and I cleaned as I went along.
If you are reading this with a view to take apart your own machine, please for the love of Mike make sure you have disconnected it from the power before you start poking around in it. What follows is what I did, the description may include stupid and/or unsafe practice. I'm not liable if you repeat this and stuff something or yourself up. Nuff said.
At the back of the machine there were two T15 Torx self-tapping screws on either side of the hinge assembly for the glass lid that came out.
 |
| Location of cooker top retaining screw at back of oven |
Followed by another three T15 Torx screws and washers underneath the stainless steel fascia.
 |
| Front cooker top retaining screws |
On top of the hob each of the gas burners was held on with two T10 machine screws
 |
| Hob burner retaining screws |
and each of the controls had a knob that could be pulled off with a bezel attached by a further two T15 Torx screws. The grill/top oven control had a small spring between the knob and the gas control.
 |
| Location of bezel mounting screws underneath control knobs |
Twenty-three screws later and the top was loose. What I should have done next was lever off the stainless fascia and remove its earth tag giving access to the command panel,
 |
| Fascia retaining clip and earth tag locator above first control knob recess |
this might have allowed me to remove the command panel without disconnecting the whole cooker top, But instead I removed all the spade connectors from the command panel at the front (4) and the hinge housing (16) at the rear of the hob, making sure that before I disconnected them that I had a note of what went where.
 |
| Command panel connections viewed from rear of machine |
 |
| Hinge housing connections view from front of machine |
 |
| Connection diagram Zanussi ZGC551GXC |
This allowed the cooker top and attached lid to be lifted forward and off the oven and the command panel to be removed from the two silver retaining clips.
 |
| Command panel released from cooker top housing |
The command panel could then be released from its translucent brown plastic enclosure and the remnants of the broken button were released.
 |
| Disassembled command panel |
To repair the button I drilled out a 1.5mm hole along the shaft of both broken ends of the button, inserted a suitably sized piece of stiff 1.5mm wire and glued it back together with superglue.
 |
| REME |
All that remained was to repeat the disassembly process in reverse
 |
| Reassembly of oven |
Including the door gasket fix I reckon to have saved £30 in parts and £120 in labour for an engineer. JOB DONE.
Time spent : 1 day including cleaning/drying time
Cost : £0.00
I appreciate everything you have added to my knowledge base.Admiring the time and effort you put into your blog and detailed information you offer.Thanks. OVEN REPAIR IN CHINO
ReplyDelete