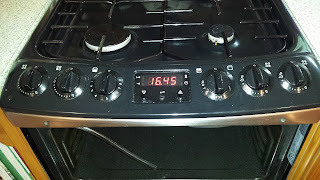
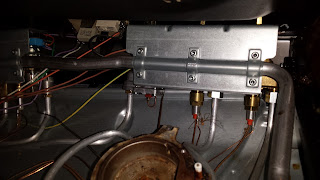
Before I posted the write up on the second fix on the cooker (repairing the broken button) I had to try and work out whether I had done anything illegal or not.
Even before I started the repair I had to think carefully about whether taking the top off the cooker would affect any of the gas tight joints, as that is obviously a safety risk, and this was the main reason for posting on ukwhitegoods.co.uk. I will freely admit that I was not read up on the relevant gas safety legislation but as I was not going to be altering any of the joints I felt the risk of a leak was negligible. If you follow the link to the forum you will see that I got one 'knee-jerk' response to my request for information which was that I "must" have a Gas Safe engineer look at it. "Must" is quite a strong word in regulatory documents meaning that you have no choice about compliance.
A trip was made to the Gas Safe Register home page for more information. The Gas Safe Register is quango run by Capita for the HSE and they are responsible for licensing engineers who work with gas appliances. They also publish a factsheet that details who can do what with gas appliances. Therein lies,
What gas work can I do myself?
The definition of gas 'work' is quite wide ranging but you can perform the tasks set out in the user's instructions, (provided by the appliance manufacturer) that are intended for the user to carry out. This would not be a breach of the law. The law allows you to replace or adjust any component or control that is designed to be operated, or replaced by the gas consumer e.g. a cooker tap control knob. However you should not do anything that involves disturbing the gas carrying components (such as the gas supply pipe) or that could affect the combustion process (such as removing the combustion case of an appliance — see Can I take the case off my gas appliance? below).
As I'm not going to be affecting the gas carrying components and the repair is to something that is to be operated by the consumer, it looks like I'm OK. However I am going to have take part of the "case" off the cooker, ie the cooker top. So reading a bit further down gives
Can I take the case off my gas appliance?
It depends on whether the case is purely decorative or whether it is an integral part of the appliance.
Decorative casing: These cases can usually be removed by the consumer e.g. can be lifted off or are hinged panels and do not need to be unscrewed. A decorative case can be removed safely by the consumer or anybody else remembering to follow any manufacturer's instructions and warning labels and making sure you have safely isolated any electrical parts.
Integral casing: Many appliances have cases, which in addition to being decorative, function as a part of the combustion circuit and form an important seal around the gas carrying components e.g. burner, combustion chamber, gas valve etc. If removing the case involves undoing a number of screws, this normally means it is a functional case and it should not be removed by the consumer or a person who is not Gas Safe registered.
Well there are definitely screws involved so perhaps I can't do it. But on the other hand there is no seal on the gas burners on a cooker top as they are external. Unlike the authors of the fact sheet I don't believe the presence of screw fixings magically imparts a meaning. The important words here are "Many" and "normally," basically the case may or may not be functional. Is it?
You could argue that the cooker top is screwed down to stabilise the burner and valve assembly so is integral. On the other hand all the gas-tight seals on the burner and valve assembly must have been made before the cooker top was screwed down as there is no access once it is in position. Most likely the cooker top is screwed in to place in order to provide a stable foundation for the cooking utensils placed upon it.
In the end neither the Fact Sheet nor the pronouncements of the Gas Safe Register are law; the statutory instrument covering the work is The Gas Safety (Installation and Use) Regulations 1998 No. 2451, which states,
(6) Nothing in these Regulations shall apply in relation to—
(a) the supply of gas to the propulsion system of any vehicle or to any gas fitting forming part of such propulsion system;
(b) the supply of gas to, or anything done in respect of, a bunsen burner used in an educational establishment; or
(c) work in relation to a control device on a gas appliance if—
(i) the device is intended primarily for use by a consumer of gas; and
(ii) the work does not involve breaking into a gasway.
So as the work is a repair to a control device intended for use by the consumer (ie a button on the front of the cooker) and I'm not breaking into the gasway as far the law is concerned I seem to be OK. Note the difference in language between the Factsheet and the Statutory Instrument, "disturbing" and "breaking into" don't quite mean the same thing. When I moved the cooker out from its alcove I disturbed the gas hose from rest but as it's designed to be flexible& I didn't break into it.
So it looks like I'm safe from prosecution (at least for now).


